Loops are a fun thing in the coding world, and also a thing that saves you lots of time when you need a repetitive task to happen a certain number of times. Loops can save you coding space so you don’t get that spaghetti code look to your program, confusing you on every line. Once all of the more beginner-level programming concepts are done and taught to the students (like the if-else clause, variables, simple coding structures) it’s time to teach what a loop is, why it’s so important and how to use it.
1. Understand what a loop is. In computer programming, a loop is a sequence of instructions that is continually repeated until a certain condition is reached or a certain amount of times is repeated. Let’s say you have a bunch of strawberries that need to be eaten and you need to create a program about the process. First, you take one, you put it in your mouth, you chew and you swallow. Then, with the second and third strawberries you do the same. The process requires 4 coding blocks – take, put in mouth, chew, swallow. No need to write all of this code 3 times (12 total steps), when you can just use a loop and say – repeat this process 3 times (4 steps+1 for the loop block=5 steps). Yes, you may say “you don’t really save that much space or time with the 3 strawberries”, but imagine there were 250 strawberries. How many lines of code and how many hours would this code require? Short answer – a lot. Or you could just write it down once, put it in a loop and say “repeat this chunk of code 250 times”. Much easier and faster, right?

So, now you know what a loop is, and you also have a good example about it that you can actually tell the students too. Which leads to the second important thing.
2. Prepare examples. Nothing does the understanding job better for the brain than a good example (or a few of those). Before the lesson, sit down and think about repetitive activities or jobs that can fit into a coding loop of an imaginary robot. I often give the box of chocolates example when teaching loops. The box is full of 10 chocolates that the robot need to eat (yes, ok, just imagine a robot can and will eat chocolate). The robot starts from chocolate number 1, it takes the chocolate and it eats it. One iteration of the code is done (iteration is what you call one full step of a loop). Then the robot takes the next chocolate, which is number two and so on, until there are 0 chocolates left and the robot has eaten all of them. Other examples that I often use are:
- a bunch of apples to be eaten like the chocolates
- a bunch of babies to feed
- a number of seeds to plant
- a number of books to read over the Summer vacation
3. Do a presentation with explanations. You can just talk about what a loop is, how it works and discuss the examples, but something that I have learned from my teaching career and a good advice I got from my university professors a while ago is that visualization is the better way to permanently learn something. If you see the data, pictures, examples and not just talk about it, you do learn it better, a bigger part of the information remains in your head and you won’t forget the lesson as fast. I always do a presentation about 99% of the stuff that I am teaching. Depending on my audience, if it is younger students I would use more colors, fun gifs and jokes, more examples and more pictures.
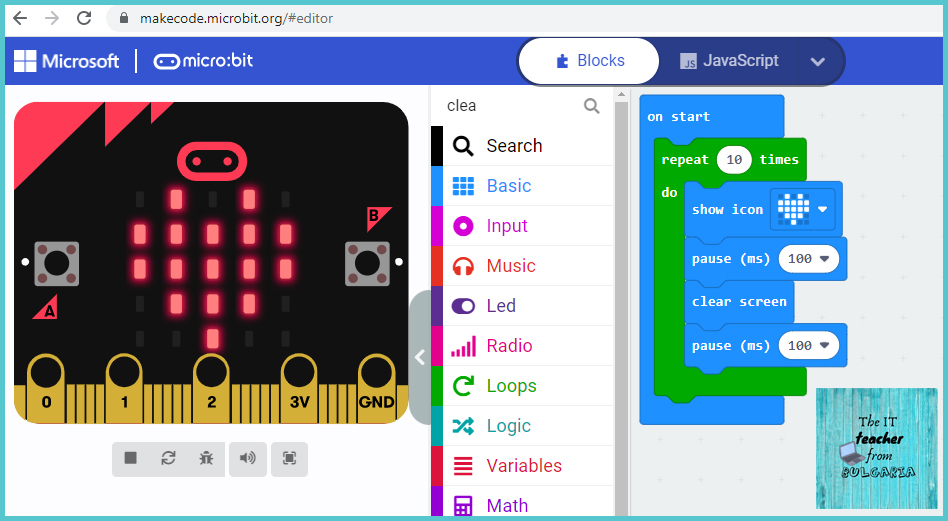
4. Add real coding examples. Depending on the technology and language that you are teaching, you have to include some real examples of the code of a loop and an example of how it works. Since this post is about the microbit circuit board, let me give you an example with it. The first I usually do when I teach loops in microbit coding is the heart flashing example. Basically, you code the board to show a flashing heart on the LED matrix (you have a preprogrammed heart in the small example gallery in the makecode coding environment, no need to do it from scratch). The code is simple – show heart, pause for 100-200 ms, claer screen, pause for 100-200 ms, repeat these steps forever in an endless loop or set it to a certain amount of times. Let me show you a fast coding example of the flashing heart:
5. Exercises. You taught your students what a loop is, how it looks like, how it works, its code, you gave examples, and now the only thing left is to exercise the new knowledge. Think of different coding tasks (at least 1 or 2) that you can give to your students and they can work on them for the remaining time. Things like “flash a smiley face 10 times”, or “show all odd numbers between 1 and 9” etc.
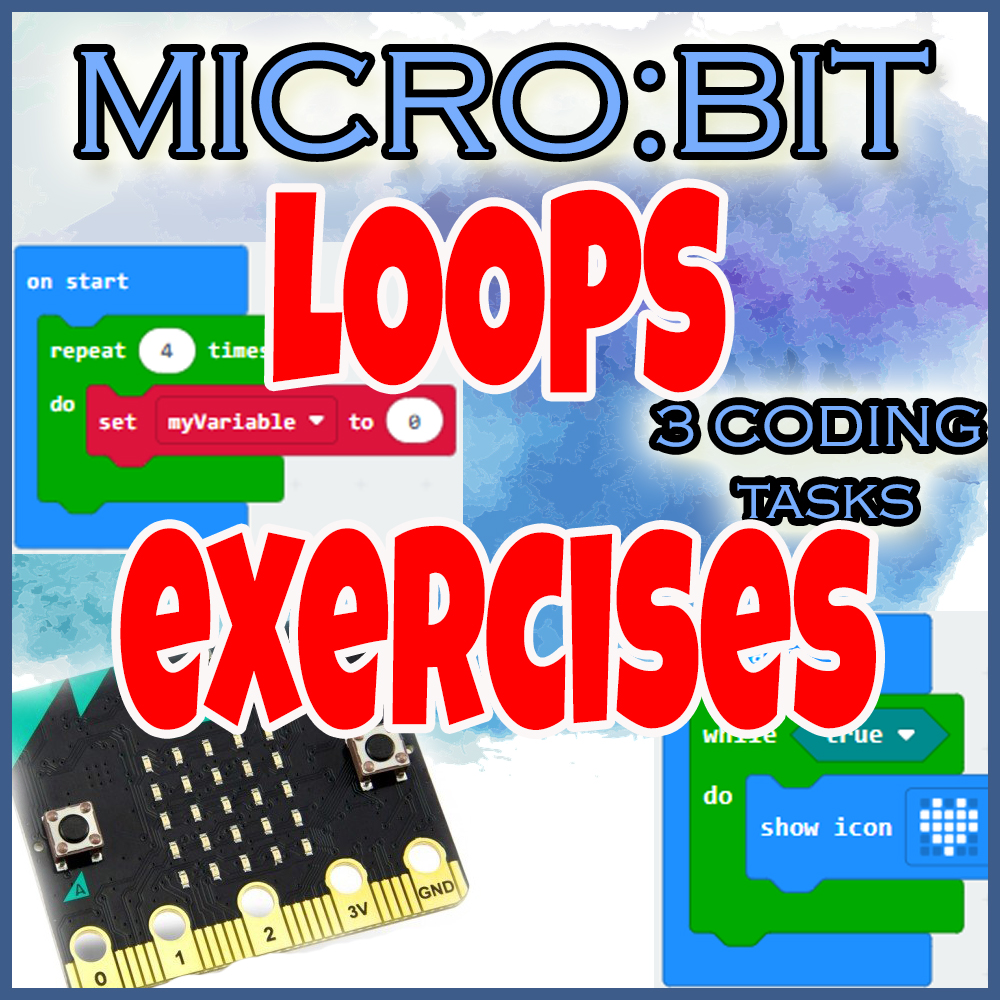
If you don’t feel like wasting time coming up with your own exercises, you can click here and purchase my microbit loops exercises resource (everything is in there – explanations, descriptions, examples, screenshots, exercise coding tasks and answer keys, no prep required): Microbit LOOPS exercises with 3 coding tasks and explanations
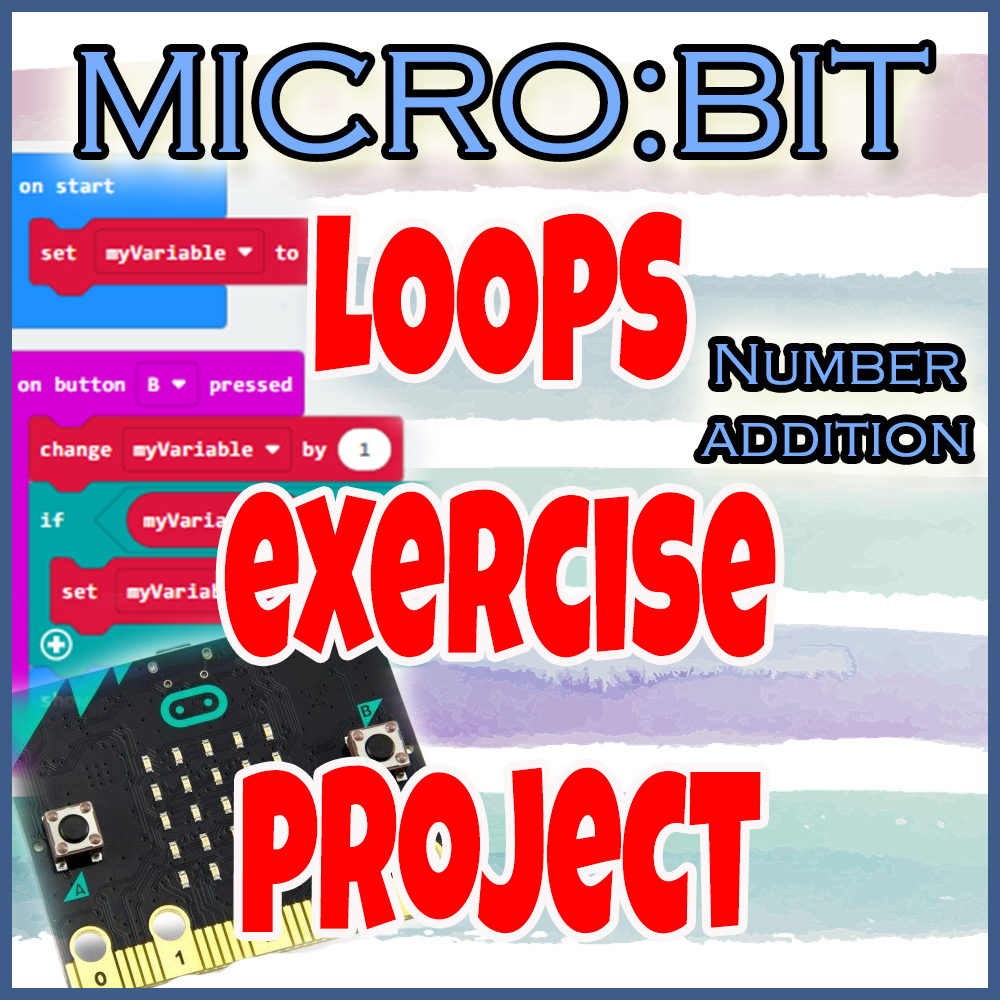
And if you need something a bit more complicated, that will take a bit more time (and turn into a cool mini project) you can check out my loops exercise project right here: Microbit LOOPS exercise PROJECT with a coding task and instructions
You can use all of the information above to teach any technology or programming language, but since this post is about the microbit circuit board specifically, let me tell you how loops work in there.
Microbit loops
There are 3 main microbit types of loops – the “for” loop, the “repeat” loop and the “do-while” loop. All of them serve the same purpose – to repeat a chunk of code, but also, all of them are used in a different way and are better in certain situations. Let me clear the confusion. Also, I have created a separate complete lesson for each type of loop, with explanations, descriptions, examples, screenshots, exercise coding tasks and answer keys. You can purchase the whole bundle of lessons, plus two separate ones dedicated to loops exercises here:
For
The “for” loop uses a built-in variable called “index” to track the different iterations. For each state of the “index” variable, you get one repeat (iteration) of the loop. Example: For each number between 0 and 5, display a smiley face on the LED matrix. Result – a smiley face flashes on the screen 6 times (yes, six times! Zero also counts!). Iterations: 0=smiley, 1=smiley, 2=smiley etc.
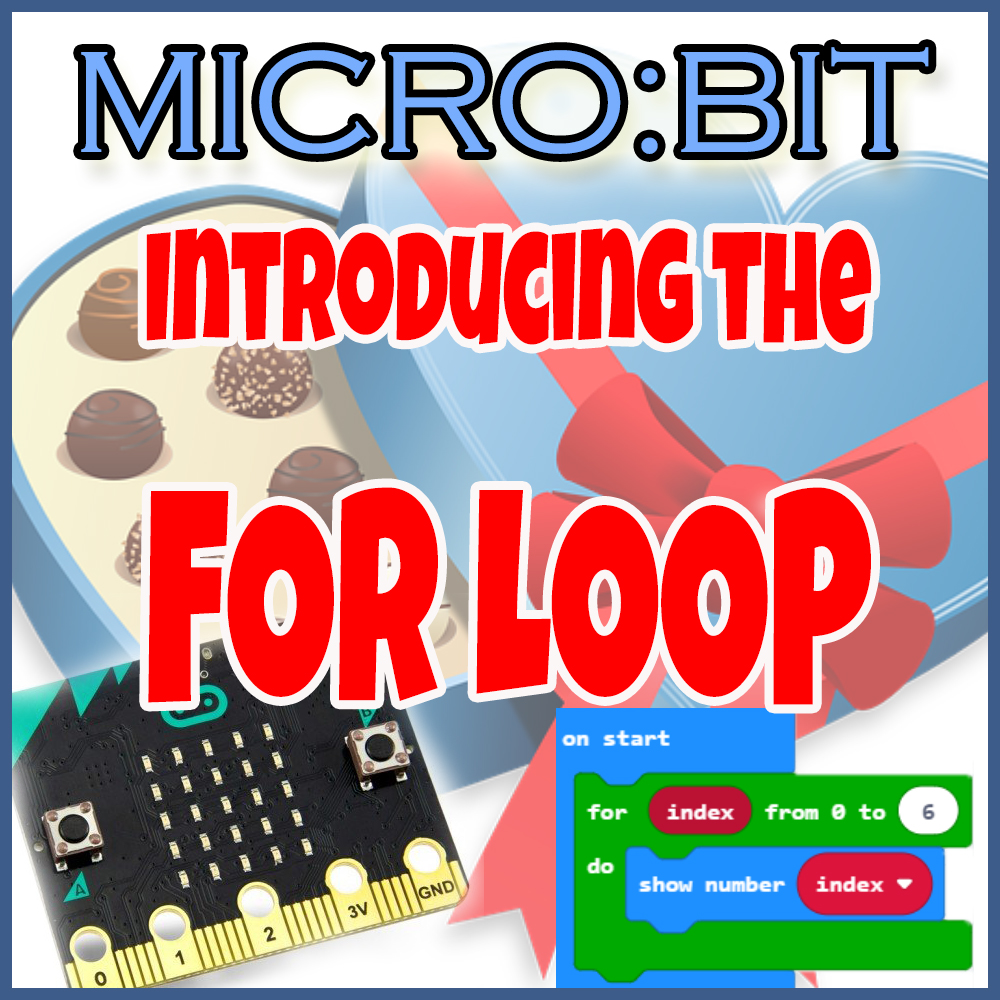
I have created a separate complete lesson for this type of loop, with explanations, descriptions, examples, screenshots, exercise coding tasks and answer keys, all in one file, ready to be shown to the students (no prep required). If you don’t feel like creating your own, or if you want to save time, you can click here and purchase it: Microbit Introducing the FOR LOOP lesson and tasks theory and practical coding
Repeat
The “repeat” loop repeats a block of code a certain amount of times. Plain and simple, very easy to understand. “I want this chunk of code repeated N times” and that’s it.

I have created a separate complete lesson for this type of loop, with explanations, descriptions, examples, screenshots, exercise coding tasks and answer keys, all in one file, ready to be shown to the students (no prep required). If you don’t feel like creating your own, or if you want to save time, you can click here and purchase it: Microbit Introducing the REPEAT LOOP lesson and CODING tasks
Do-while
The “do-while” loop repeats a block of code while a certain condition is true. When it becomes false – the loop ends. Example – there are 5 apples in the bowl. Eat them, one at a time, as long as there are any apples (>0) left in the bowl, meaning when the apples become 0, the loop ends and the condition “while there are still more than 0 apples” becomes false.
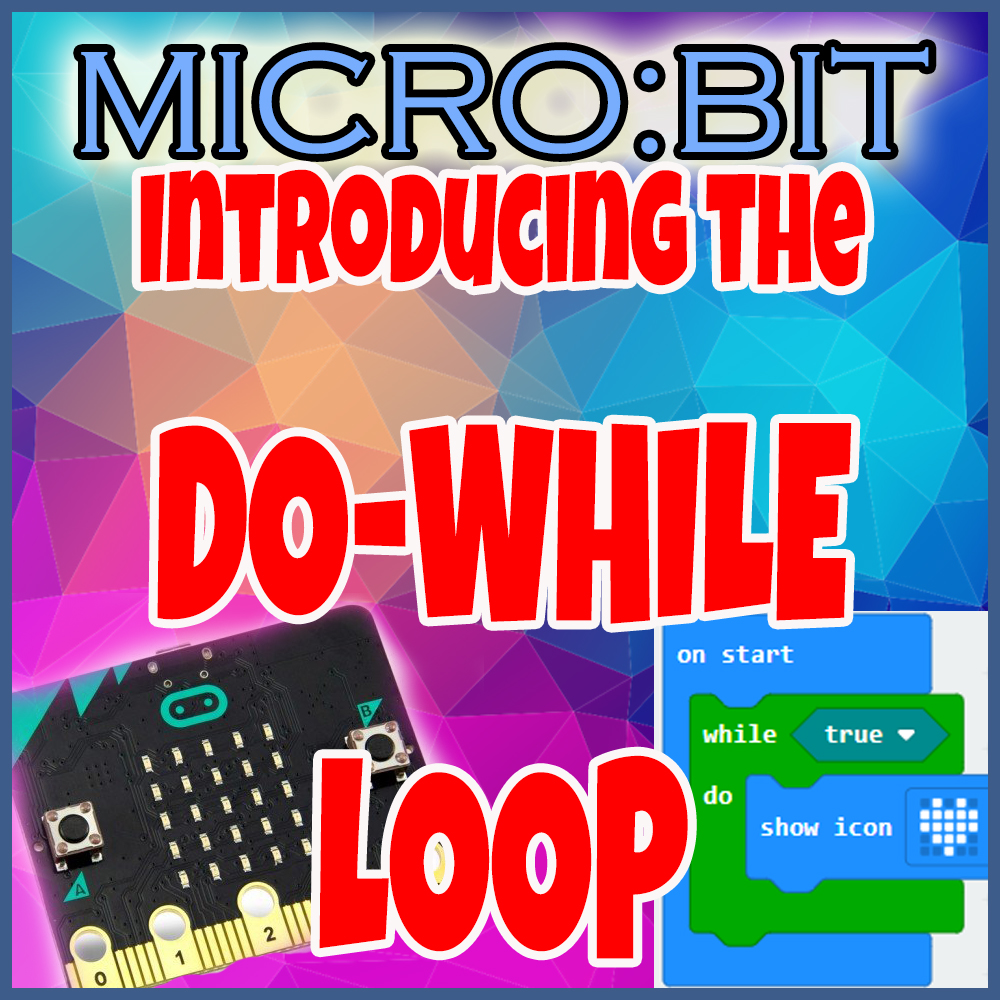
I have created a separate complete lesson for this type of loop, with explanations, descriptions, examples, screenshots, exercise coding tasks and answer keys, all in one file, ready to be shown to the students (no prep required). If you don’t feel like creating your own, or if you want to save time, you can click here and purchase it: Microbit Introducing the DO WHILE LOOP lesson and CODING tasks
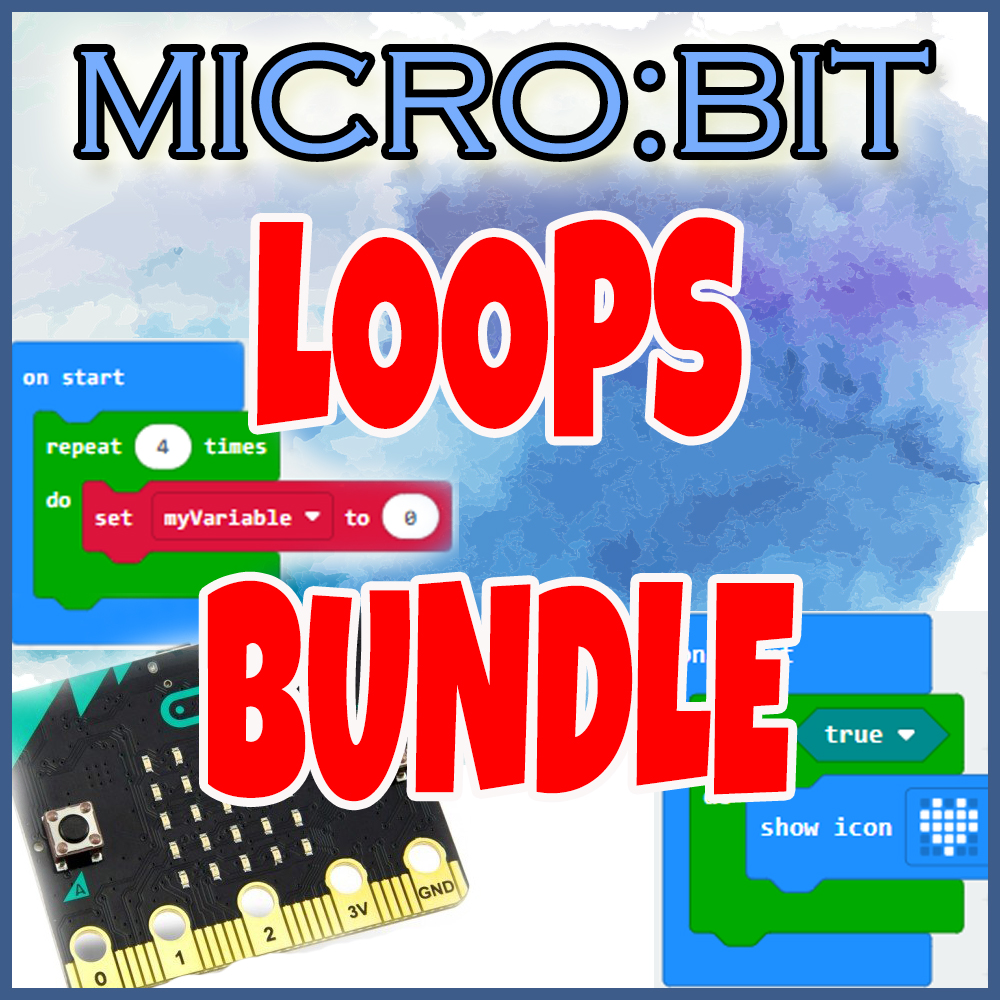
If you like all of my work, and if you want to save a lot of time (done properly, about 6 or 7 weeks of saved time!) then you can purchase all of the lessons and resources presented in this post by clicking here, where the whole bundle is:
Microbit Introducing LOOPS BUNDLE lessons tasks theory practical coding
Happy teaching!
Grace