Python is an excellent tool for enhancing programming skills with text-based coding, something that definitely lacks in the Technology school curriculum. It’s very popular these days. Its intuitive, English-like syntax makes it beginner-friendly while remaining robust enough for advanced applications like data science and machine learning.
I am not crazy enough to think that all of my school students will be interested in actual programming though, so the solution I found is called MicroPython.
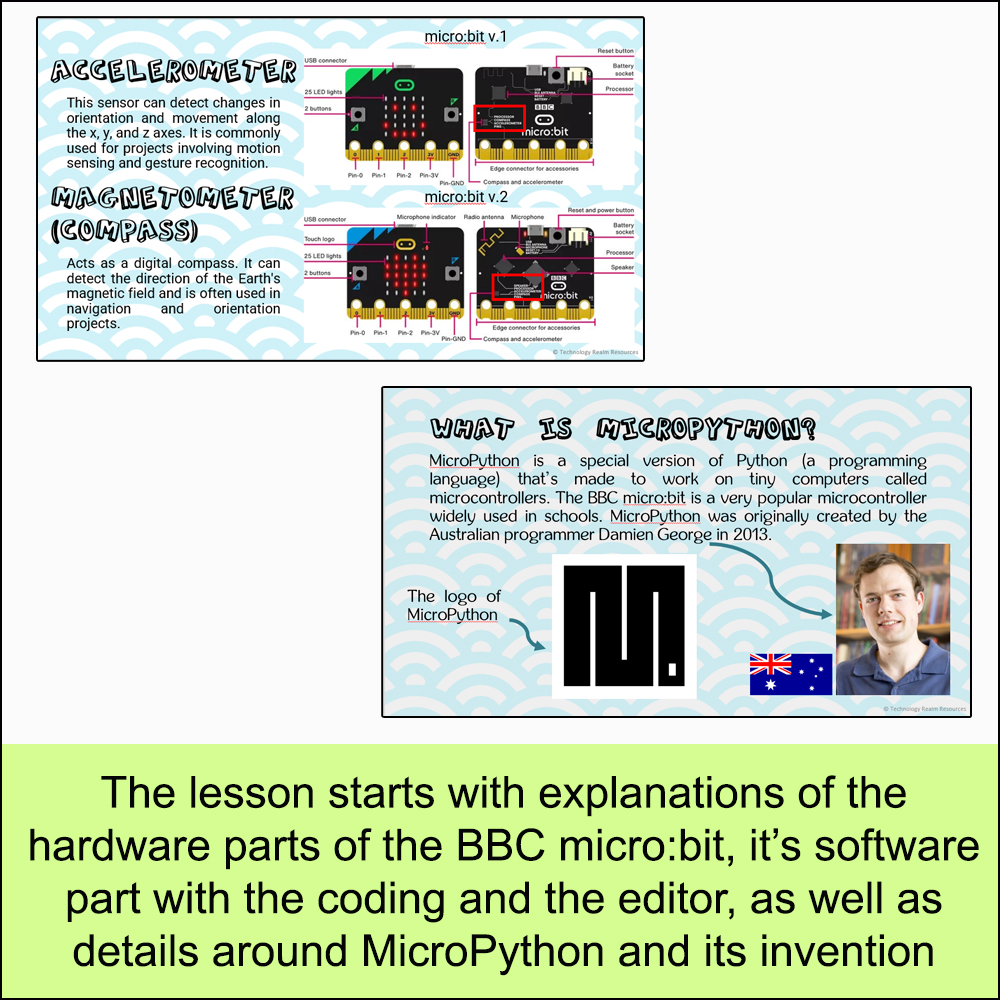
MicroPython is a special version of Python (the programming language) that’s made to work on tiny computers called microcontrollers. It’s like a simplified version of the language. The BBC micro:bit is a very popular microcontroller widely used in schools and very loved by me and my students, and guess what – it can run MicroPython! I use it all the time with my 8th graders! MicroPython was originally created by the Australian programmer Damien George in 2013.
How to use MicroPython with the microbit circuit board?
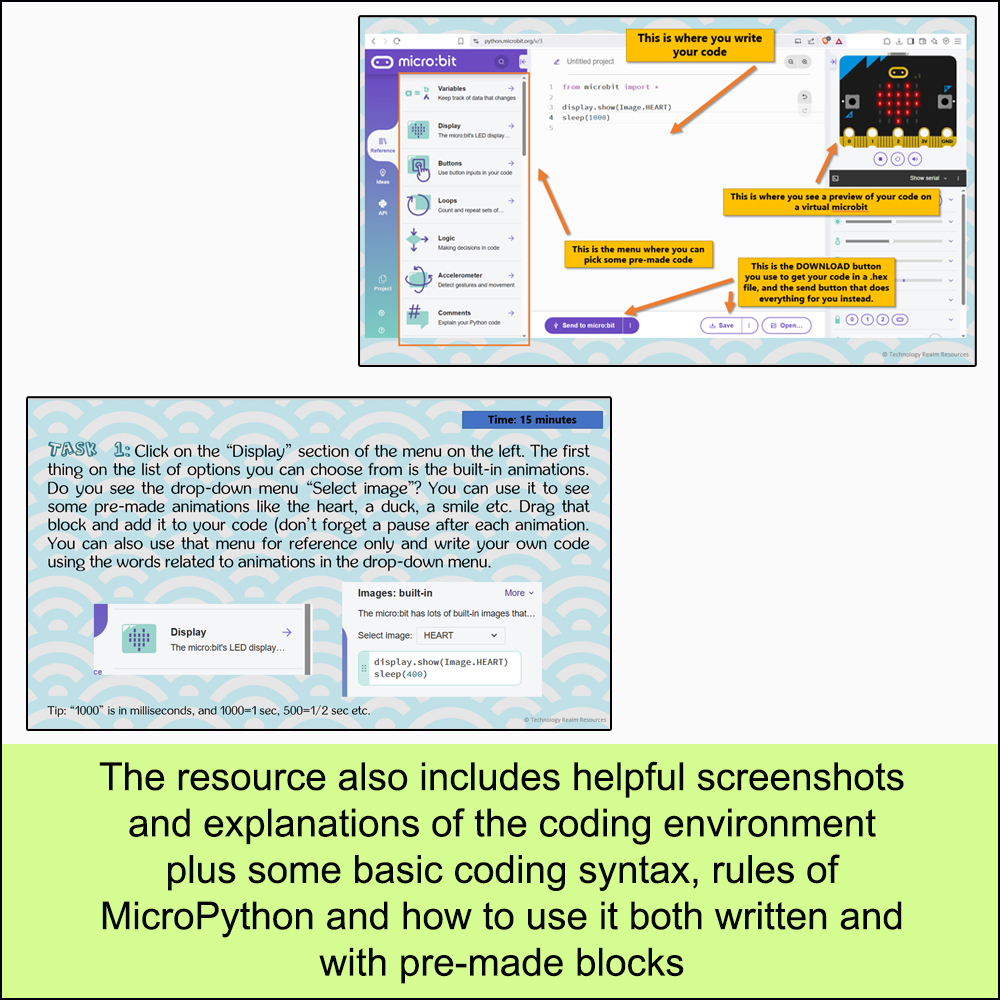
It’s easier than you think. Let me briefly explain why. Just go to the website of the online free editor https://python.microbit.org/ and you can start coding right away! The coolest thing about that editor is that you don’t need to make your students suddenly switch from block coding to actual text-based programming. The menu provided in the website let’s you drag and drop the different methods and concepts. Let’s look at the interface first.

I have highlighted the most important parts of the editor with arrows and explanations. On the left you will see a menu with the pre-made functions and methods I was talking about. Instead of knowing how to write the code that shows stuff on the LED matrix, the first time you or your students may use the “Display” menu and drag and drop the “block” that has the MicroPython display code.
In the middle is the actual editor and the blank space where your code goes. Below are the two very important buttons – Send to microbit, which prompts you to connect your microbit to the computer in order to send code straight to it, and the other button is the Save button, which lets you download the hex file containing your code, for manual upload to the microbit.
In case you don’t have a physical microbit with you, you can always use the virtual simulator on the upper right corner.
Every program starts with:
from microbit import *And then the first concepts that I always start with when I teach the subject are the display functions, like
display.show('some icon')and
display.scroll('some text')Both display things on the LED matrix of the microbit. The second one display the text or numbers scrolling on the screen from right to left, and the first one just shows the letters appearing and disappearing on the same place. Scroll is used for better readability when you have to display more than one symbol, and Show is used when you’ve got a single thing to show, like some pre-made animation of a heart or a smiley, or a single letter or number.
Another basic thing is the:
sleep(1000)Sleep makes a pause that is as long as the number inside the brackets. That number is in milliseconds, so writing down 1000 means “wait 1 second”. It’s good to use “sleep” after “show” so that whatever you’re trying to show on the screen doesn’t just appear and immediately disappear.

MicroPython opens up an exciting world of creativity and hands-on learning. As a teacher, I’ve found it incredibly fun and rewarding to explore, and I hope other educators will feel the same. Dive in, experiment, and discover the joy of coding with MicroPython! Also, stay tuned for the whole series of MicroPython tutorials and TpT products that I am now starting to create and upload!
This is the first lesson (both theoretical and practical, with teacher notes and everything) that I have created on using MicroPython with the microbit. Go and check it out and I’d love it if it helped you spark the programming flame in your students’ minds!